Behind the Scenes - Sunset Park Shoot
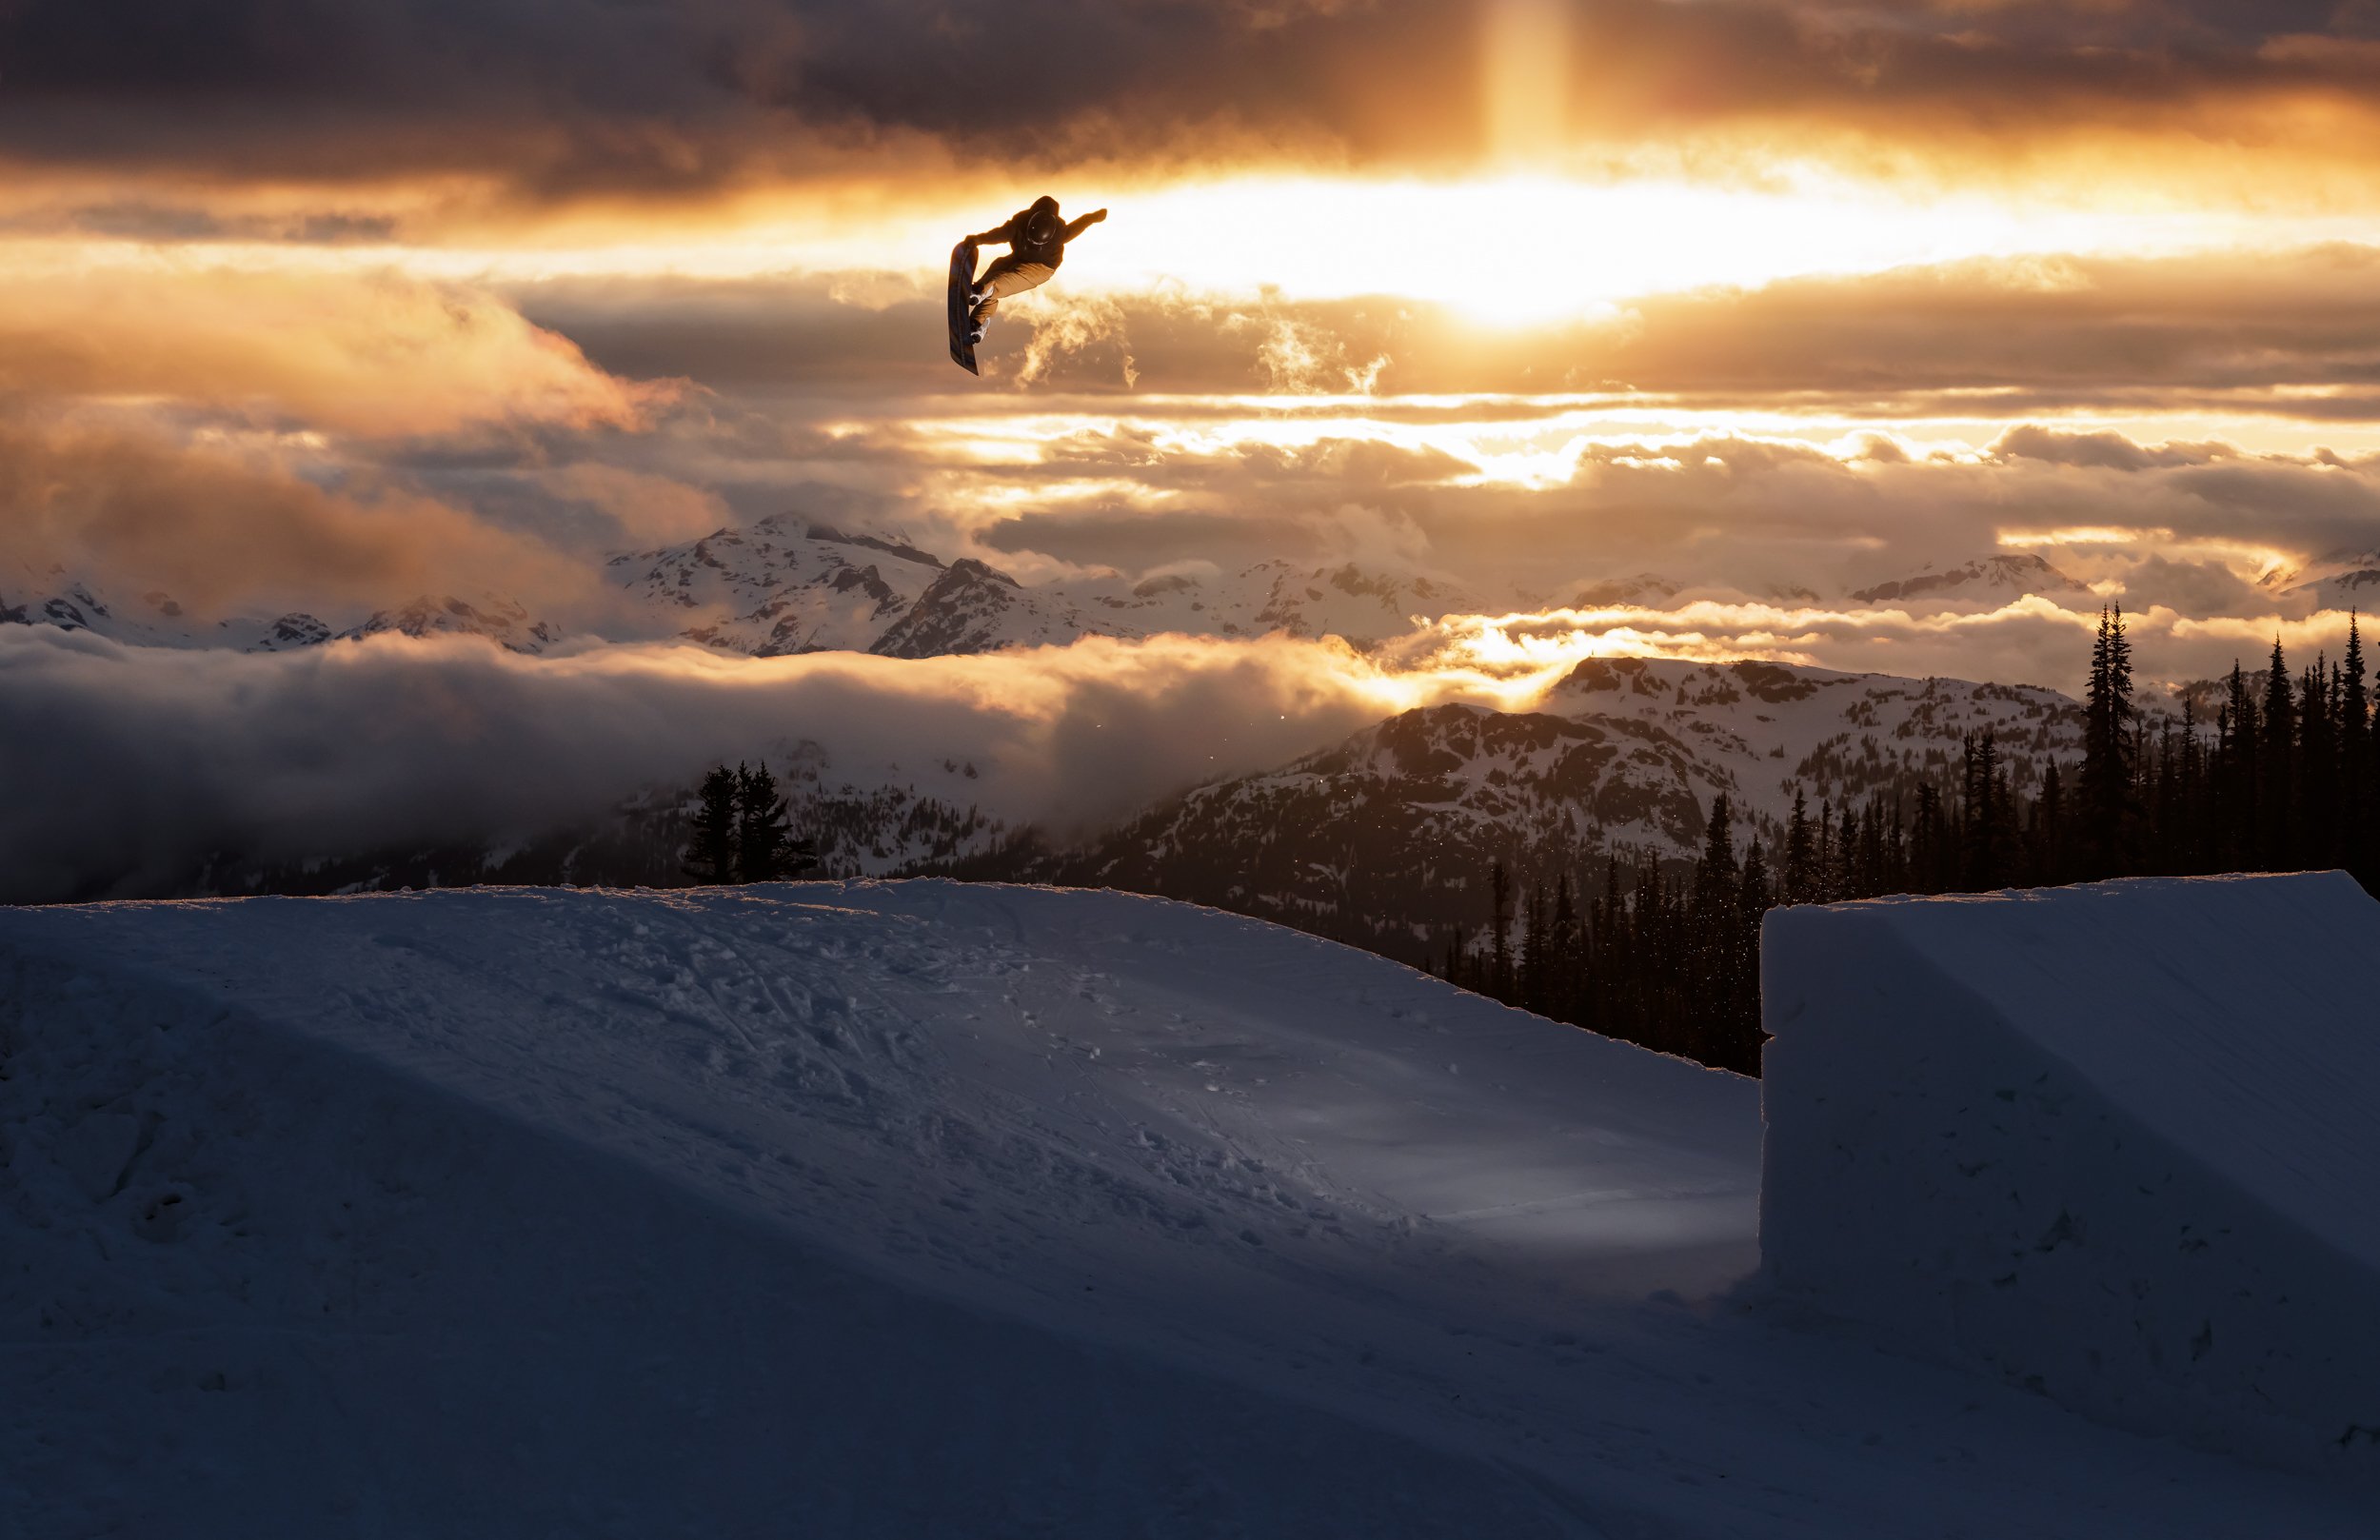
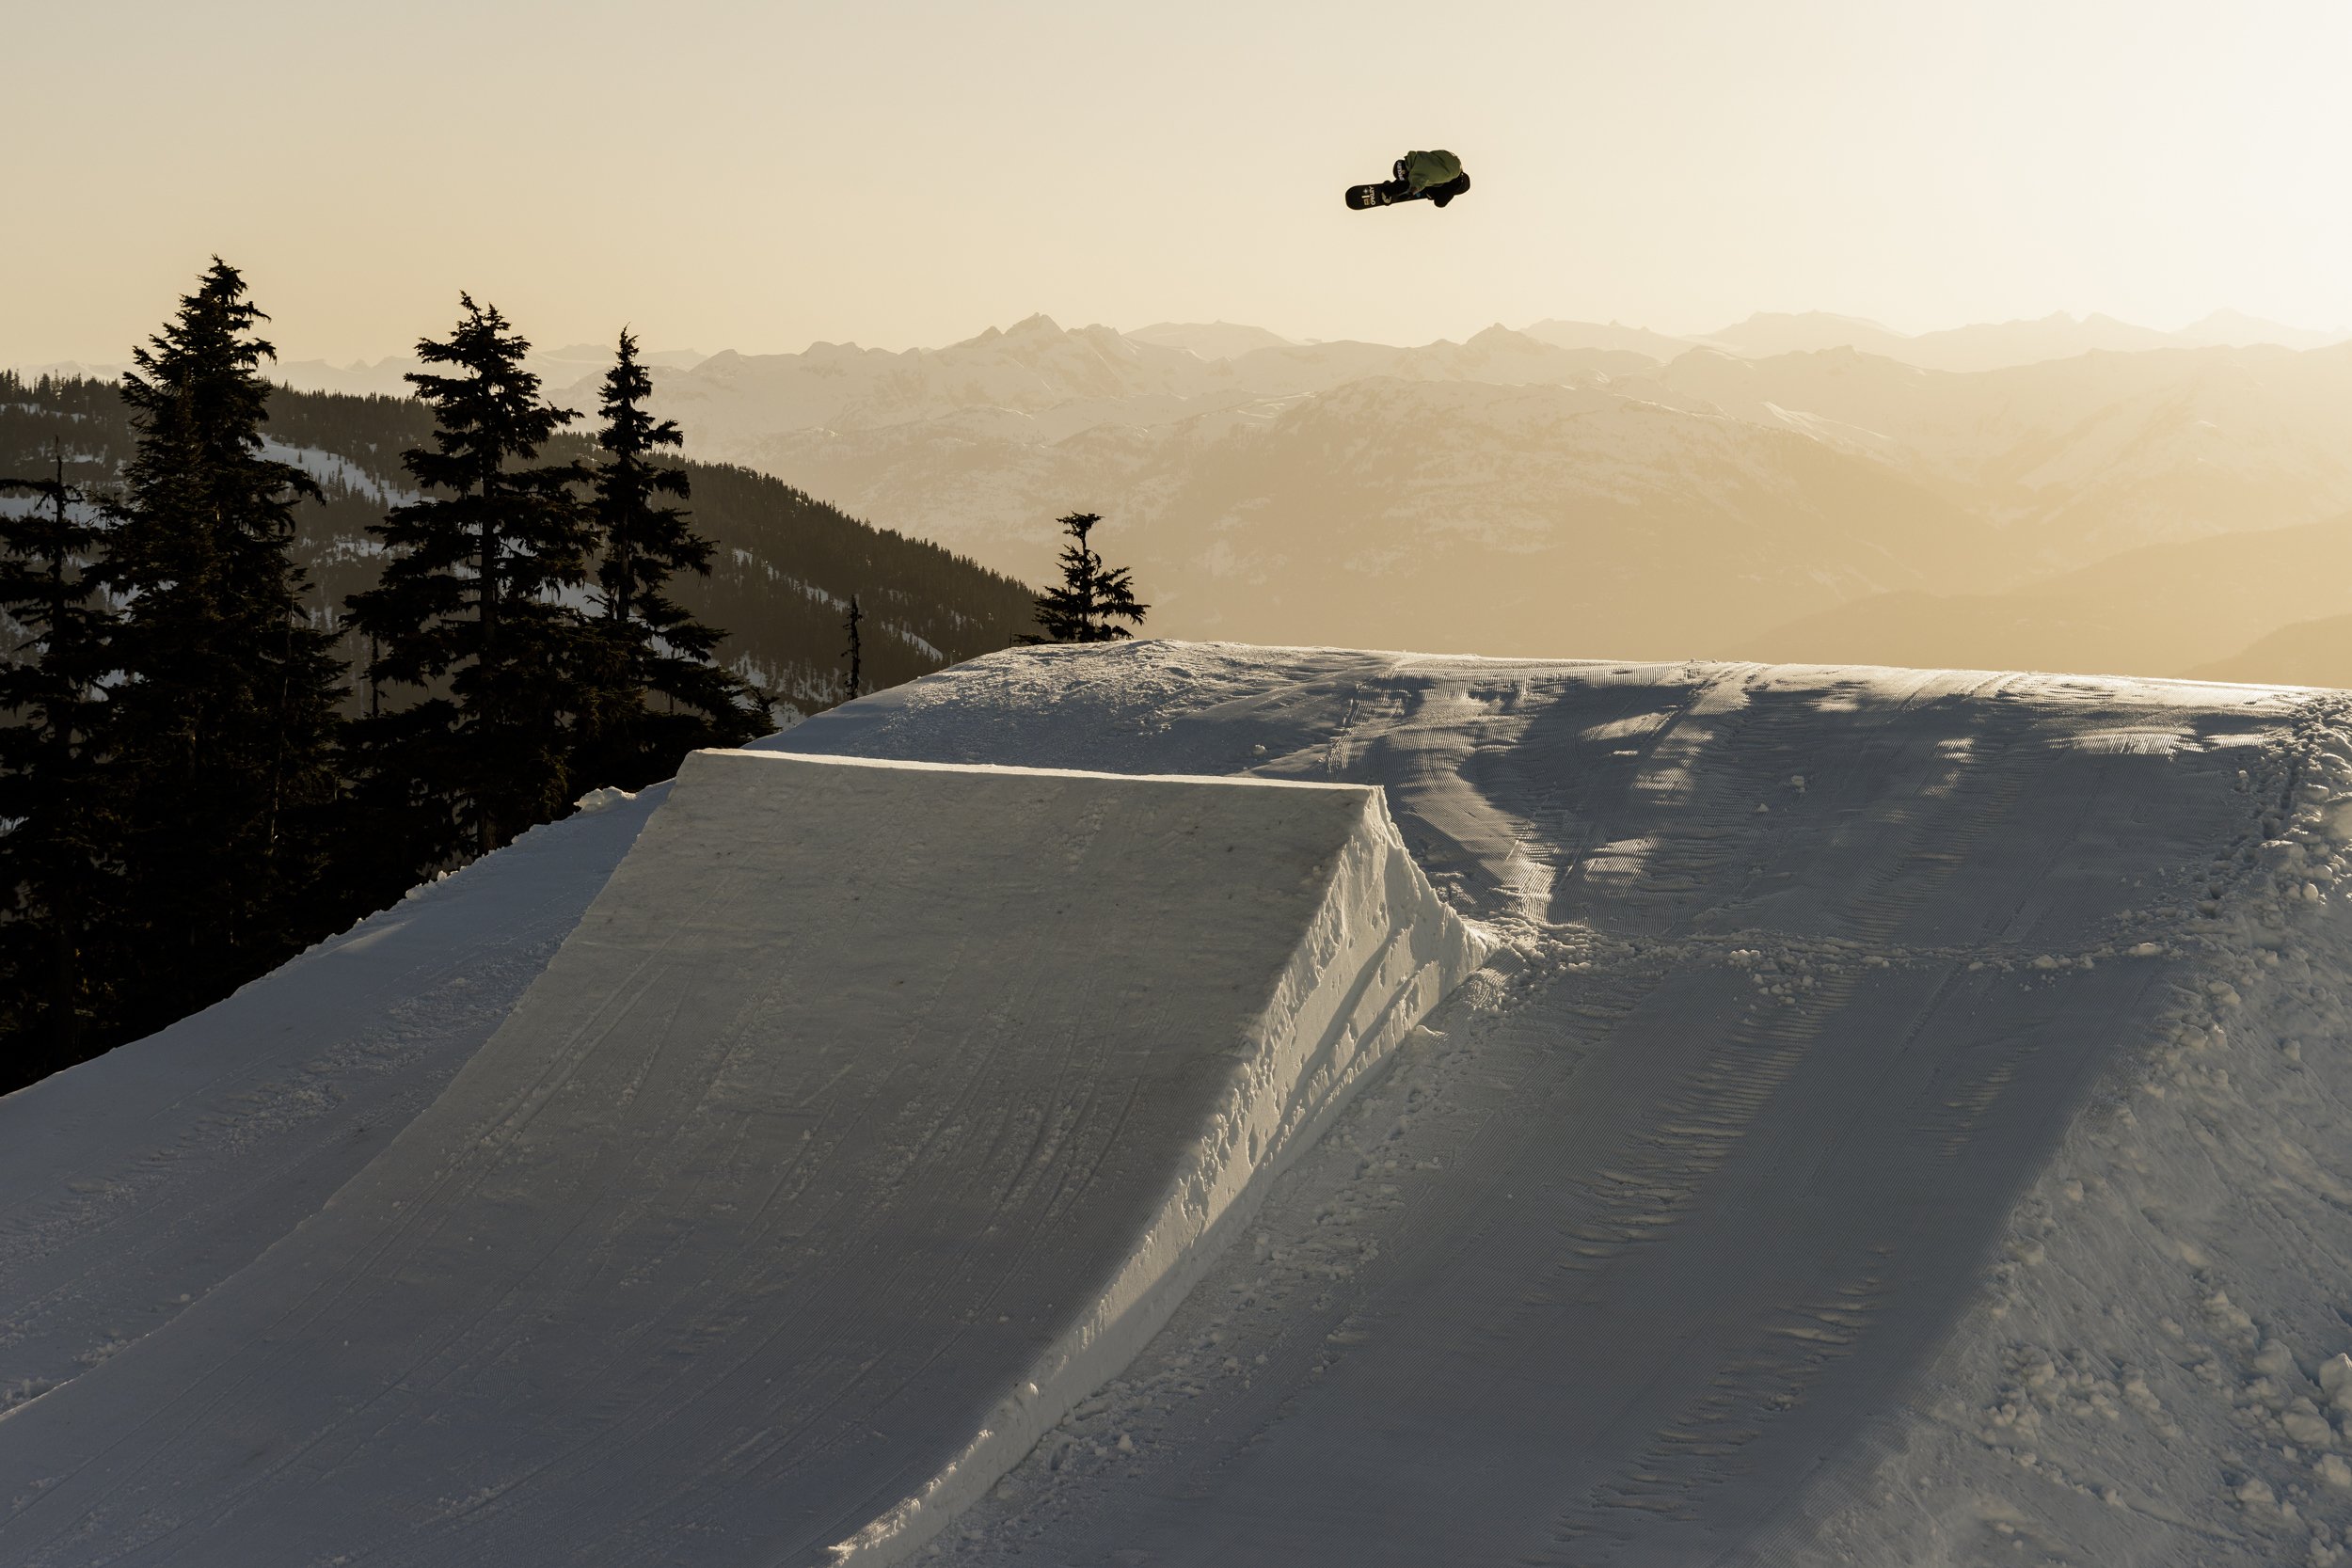
Truth Smith keeping it simple with a backside 180.
I was excited going into this shoot! In the past Whistler Blackcomb has done lots of sunset park shoots, but they haven’t happened as often in recent years. The past two years filmmakers Ryan Regher and Jeff Thomas were working on a some video projects for WB and had the right pull to be able make a few different sessions happen.
Prior to this year my opportunities to participate in a sunset park shoot like this had been limited, so I jumped at the chance when Ryan gave me a call. Photo assets weren’t specifically necessary for either of these shoots, but knowing how rare these sunset shoots are I still wanted to make it happen. Without the pressure of needing to deliver specific images it allowed for more creative freedom to capture the images I wanted to.
At the very basis of it the image I wanted to capture was the jump with sunset directly behind and the rider illuminated with the use of flash. For this particular shoot I didn’t want the details of the rider to get lost in shadow to a silhouette. Since this was part of a larger video project I made sure the firing of my strobes wasn’t going to be an issue, but once I got the okay it was off to the races.
I try to keep the gear to a minimum so I can still move efficiently. Everything I needed was packed into these two backpacks.
When shooting snowboarding with flashes I keep the gear to a minimum so I can still be able to move efficiently. With this shoot I snowboarded to all the locations and had to bring everything in one trip so everything I brought I needed to be able to carry all at once. Sometimes this limits the gear I bring, but you really only have the essentials to get the exact shots I planned.
My normal set up when I’m bring my flash snowboarding is to have two bags. One bag has all my camera gear lenses and any additional layers, gloves goggles water, or anything else I might need while I’m out in the mountain. This is my normal pack and doesn’t change much whether I’m shooting with flashes or not. When shooting with flashes I add the transmitter to this bag so it’s with the camera. Sometimes depending on the situation if I want a second light I’ll add a smaller Elinchrom ELB 400 to this bag. However for this particular shoot I only needed one light but wanted a more powerful flash and this is where the second bag comes in.
My second pack is for my flashes. This fits my Elinchrom ELB 1200 and one head. When dealing with sunny conditions, the power output of this light is ideal as you can overpower the sun and still have the flash far enough away that it isn’t in the frame. On the outside of the pack I’ll strap any stands and modifiers I’ll need. In this instance I limited it to the high performance reflector which is my go to modifier for shooting action. The bag with the flashes is usually heavier so when snowboarding I will wear this on on my back and either sling the other pack over my shoulder or put it on the front to ride. It’s not the most enjoyable snowboarding, but is the most efficient way I’ve found to carry this gear and still be able to move fairly easily.
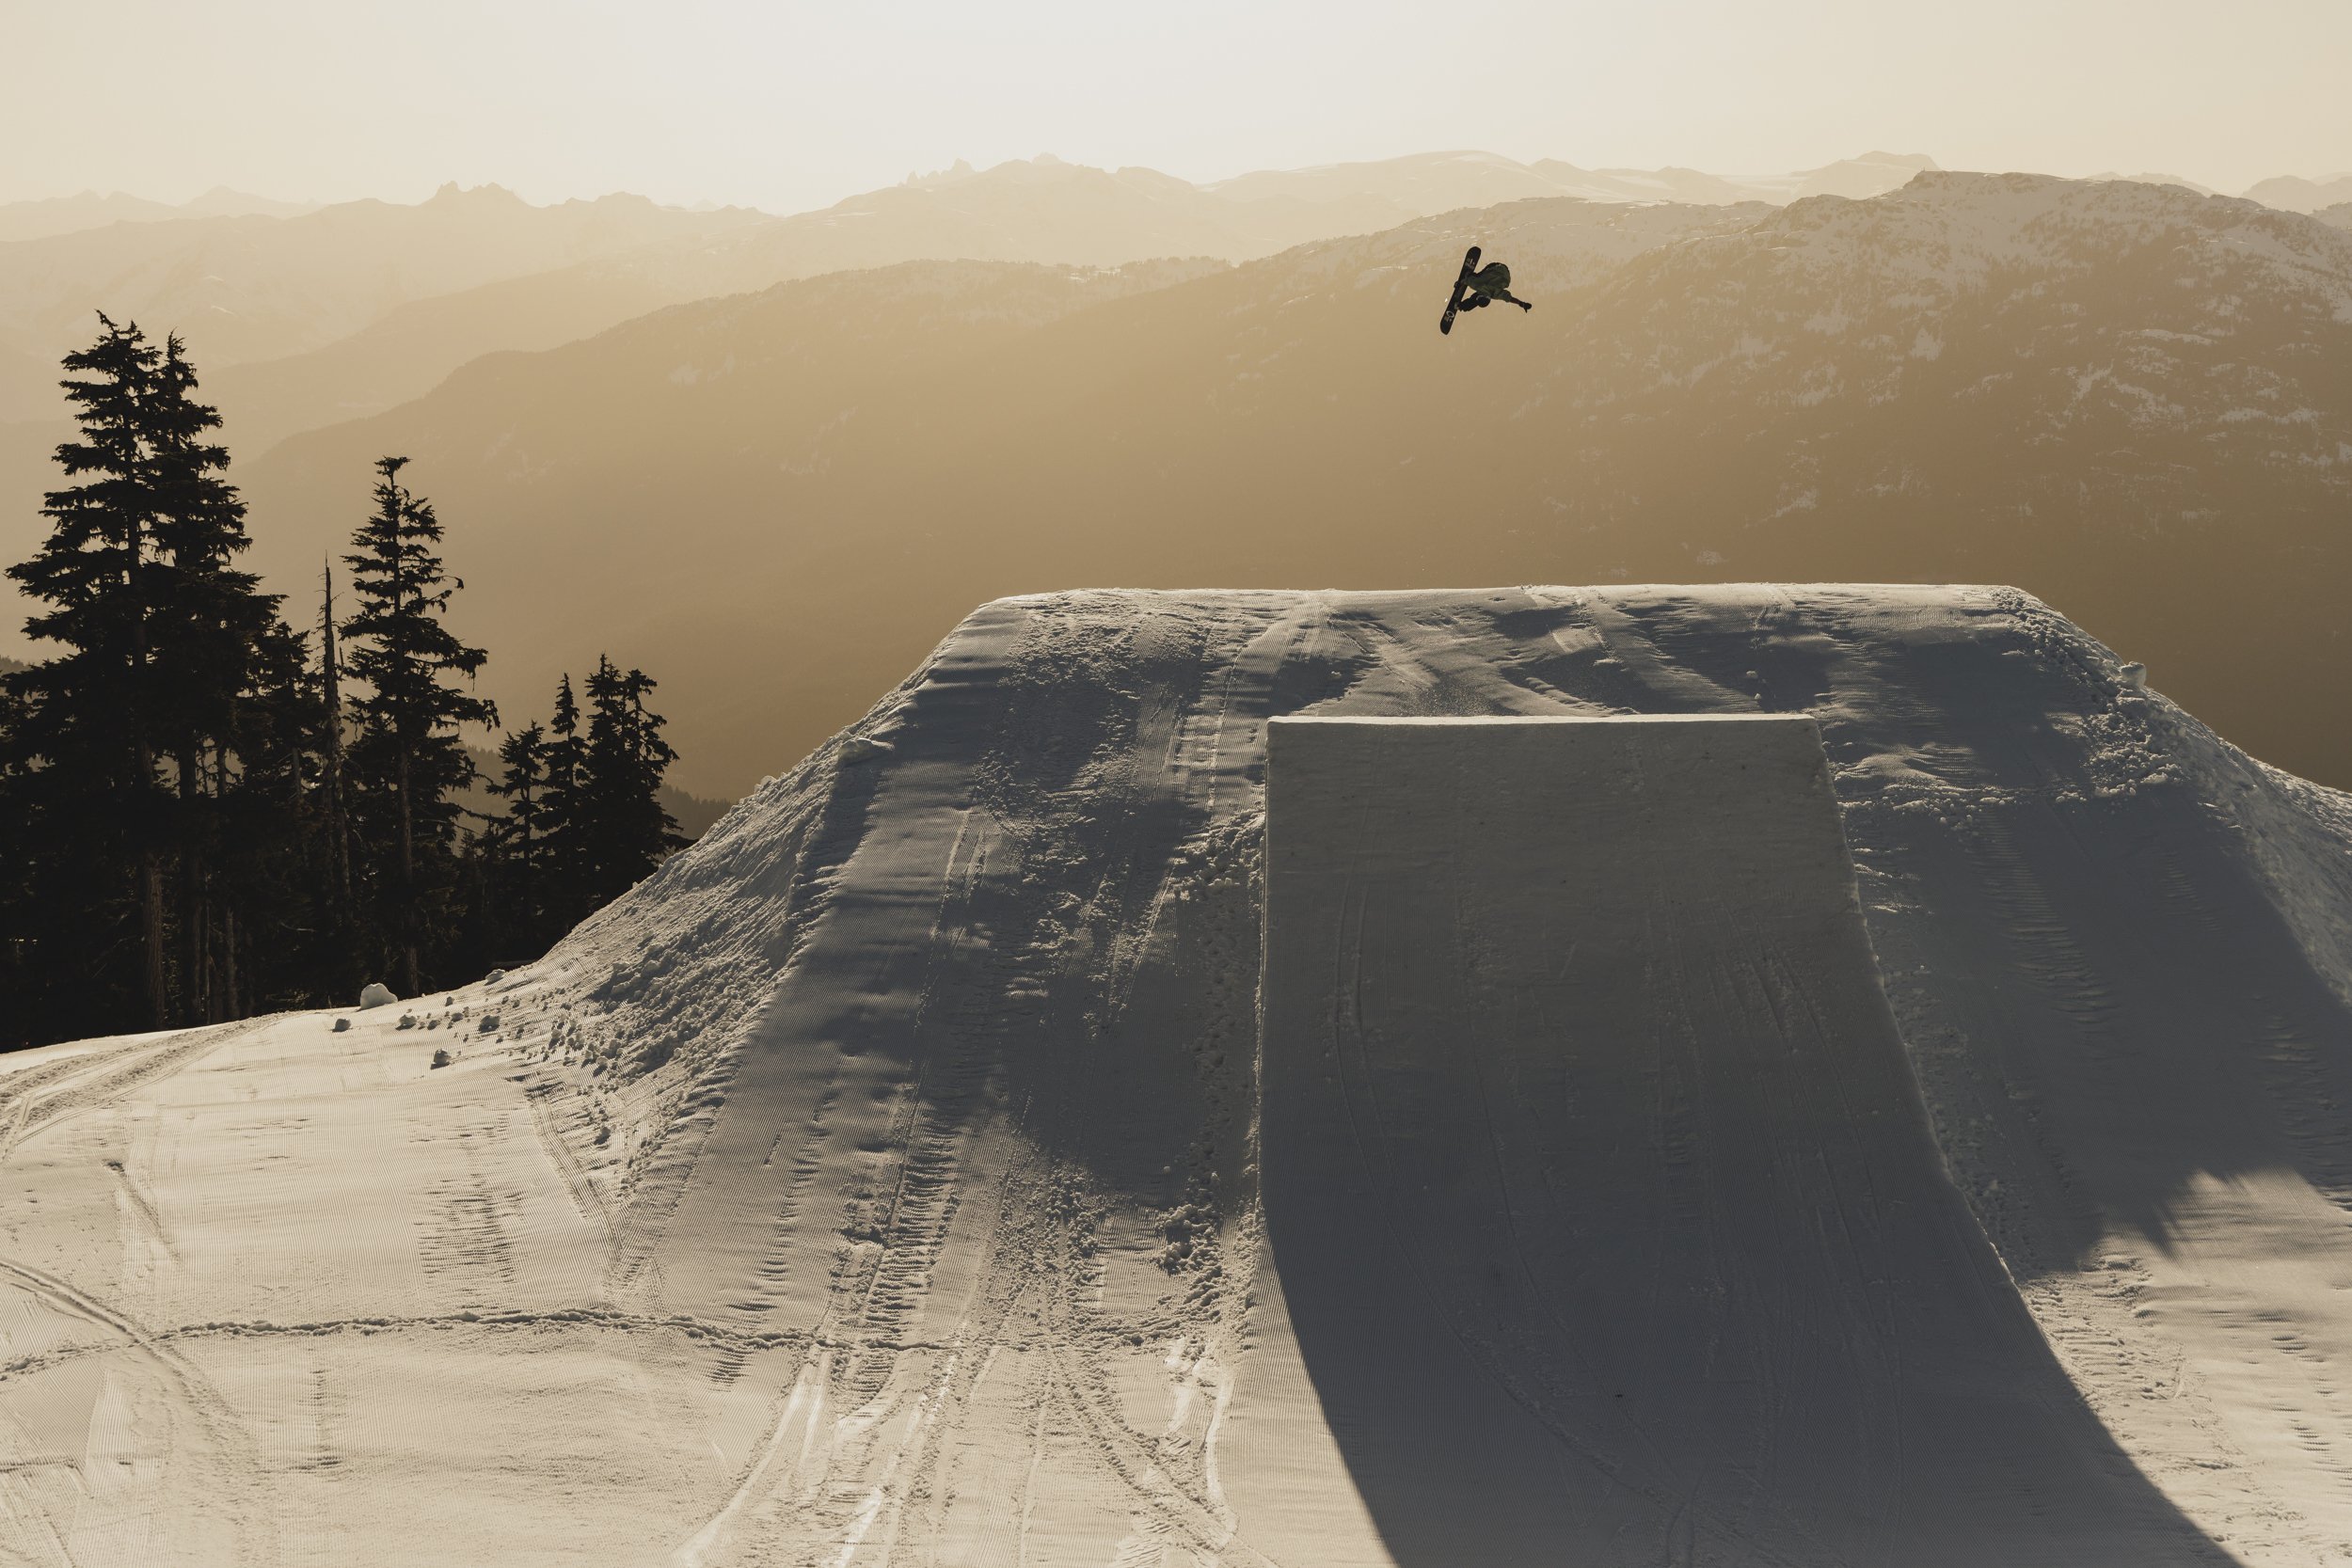
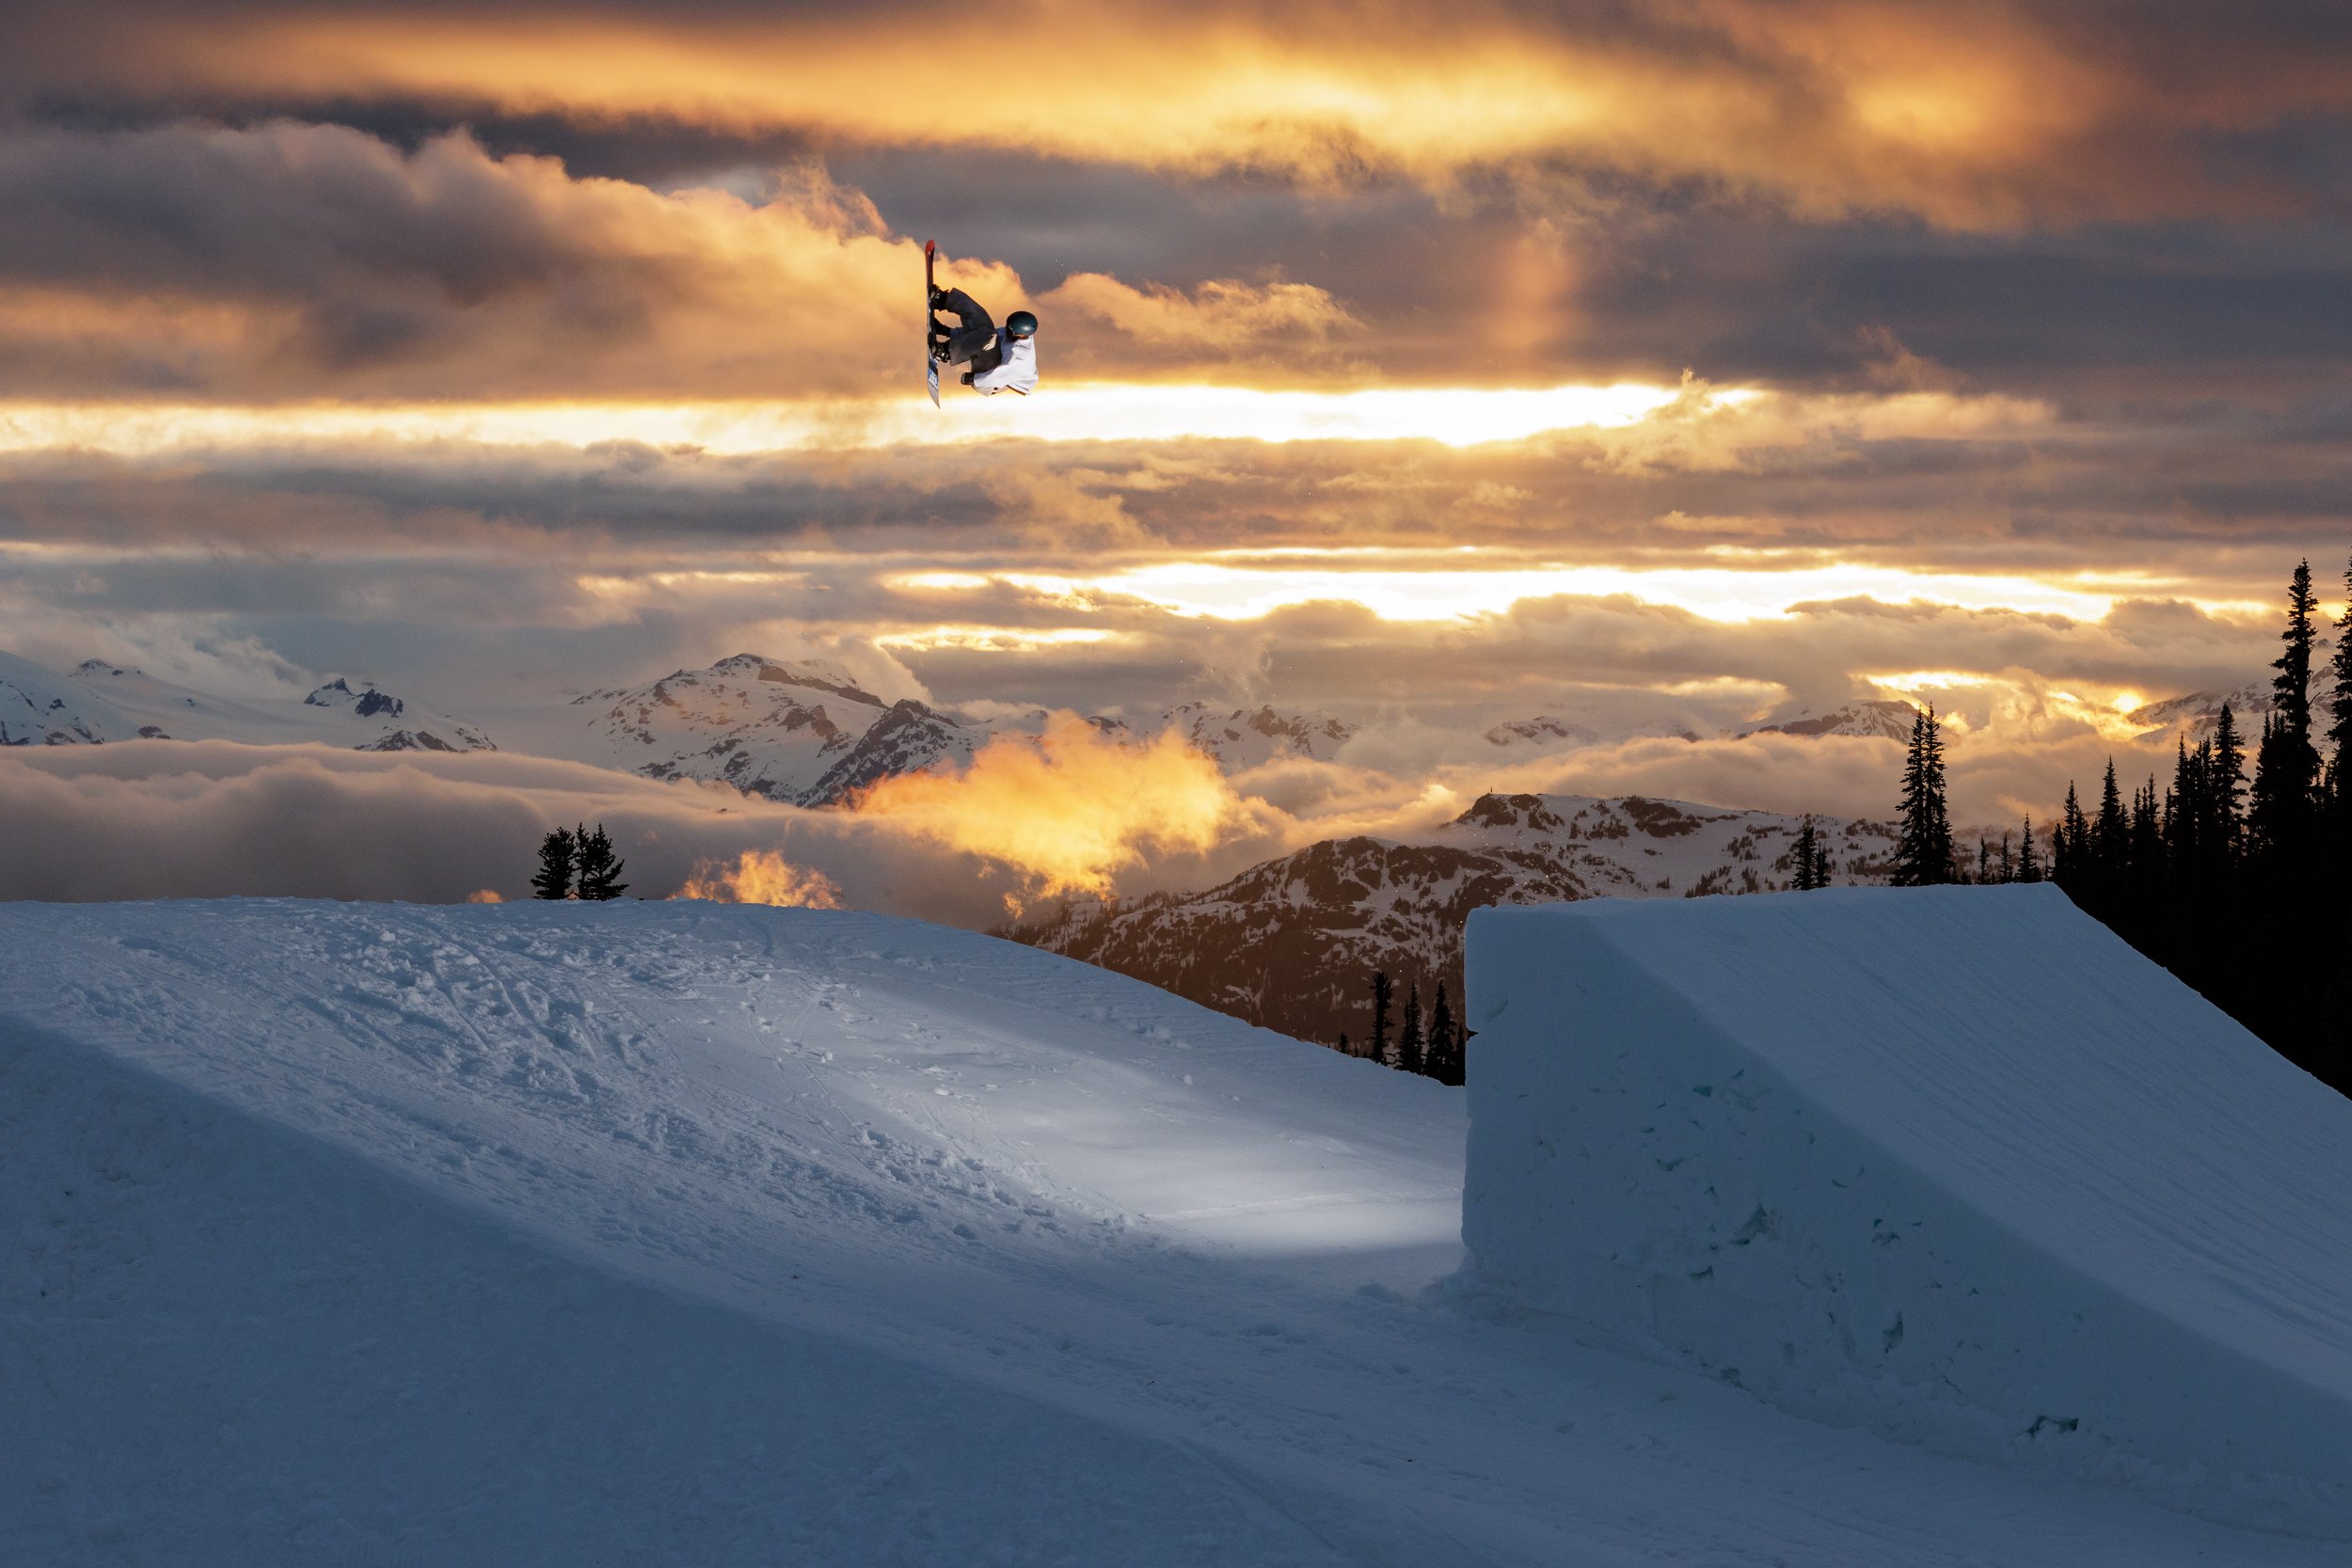
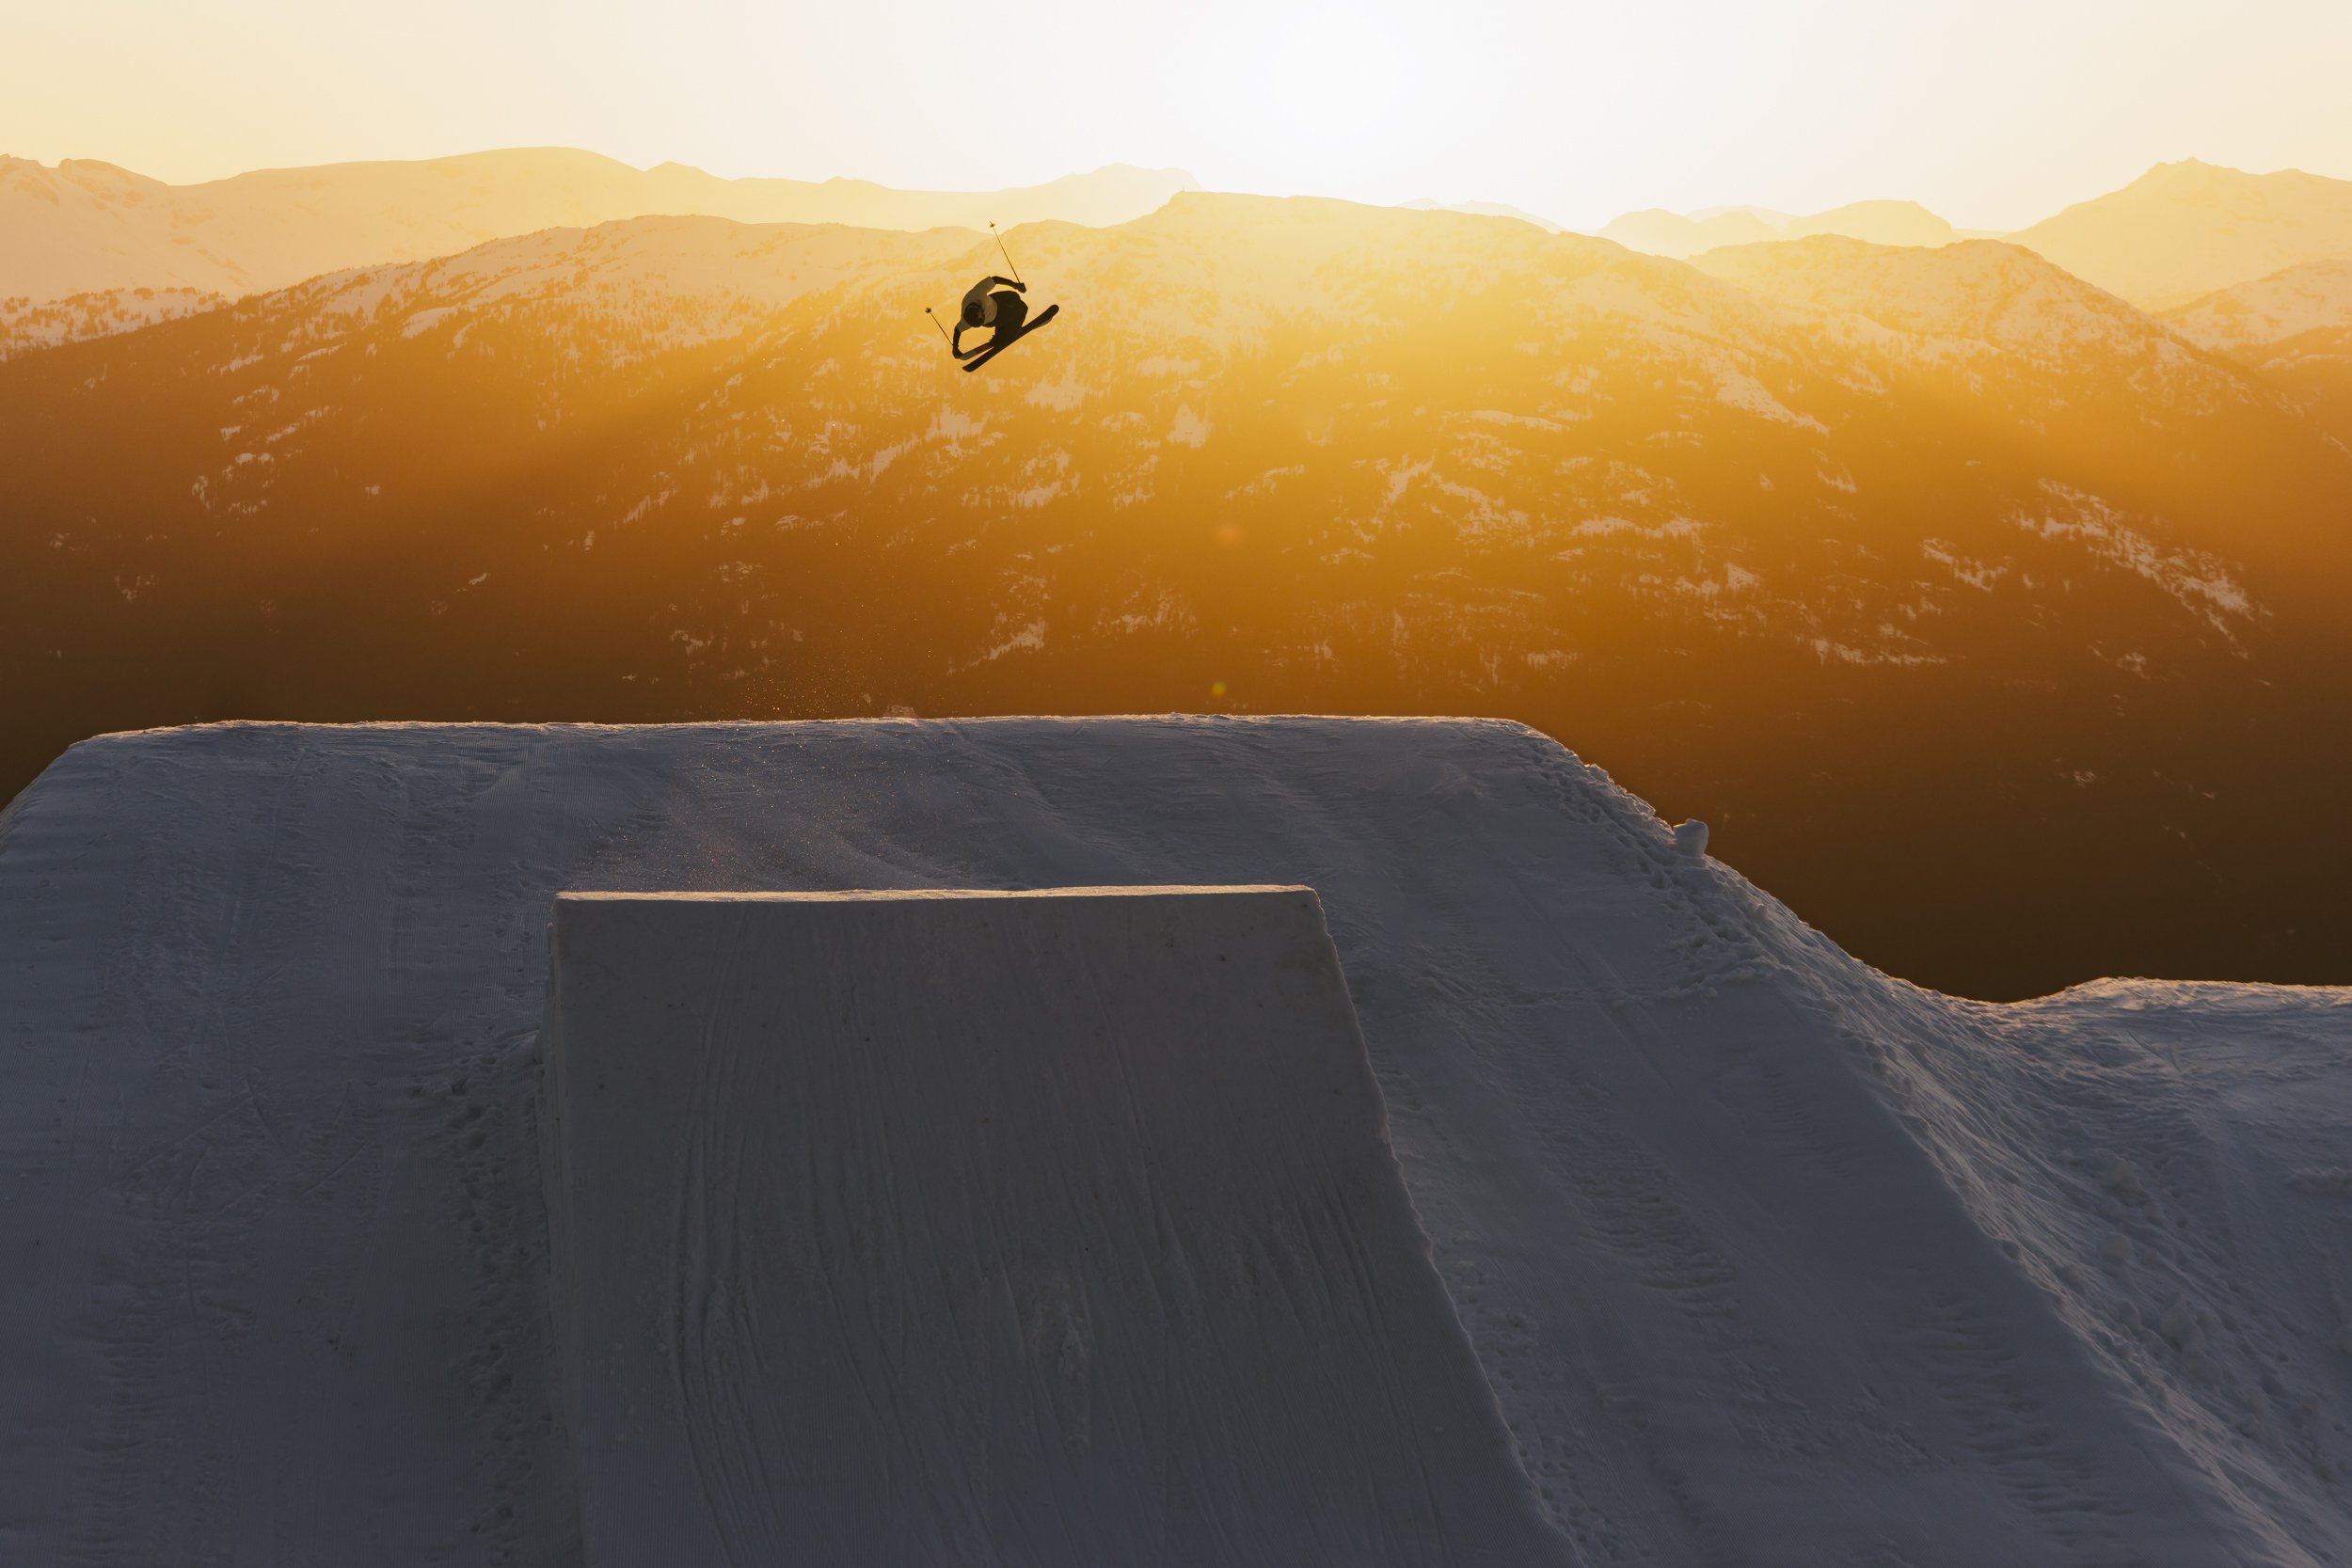
The two nights we shot were spread out over a couple weeks. The first one was a bright sunny day without a cloud in the sky, but a bit of haze. The second night was very cloudy with heavy cloud. Since you aren’t in control of the weather, you need to be slightly adaptable and able to deal with the conditions provided. On the first night I kept the lighting much more simple and only added a touch of light to fill shadows on the rider, and on the second night I made the decision to fully illuminate the rider and create a dynamic image where the rider was brighter then the sky behind them.
Simple, yet effective lighting set up.
In both cases upon getting to the jump I did a quick walk around and found the angles I would want to shoot. This is my standard practice anytime I’m shooting whether I’m using flashes or not. The next step was to set up the light which I placed directly behind the take off of the jump and aimed the flash where the riders would be in the air. Since this was part of a video shoot I wanted to keep the frame clean so behind the jump was the only location I could place the flash where it wouldn’t have been visible. Although I set the light here to hide it, it was pretty similar to what I would have done regardless as I wanted the light in a position where it would fully illuminate the rider. It’s also far enough back from the rider at the takeoff that the light has a wide enough spread to illuminate the athlete whether they drift left or right of the jump. After setting up the flash I move to my location and was able to rely on the transmitter to dial in my power levels from distance.
Since we were shooting in bright conditions, and directly into the sun I first found my ideal exposure for the ambient light, and then underexposed slightly to make the background darker. Then I did a few test frames, and dialled in the power of the pack to get the right exposure on the rider. As we shot throughout the night and the conditions got darker, I needed to adjust my flash power and my ambient exposure but was able to continuing to do using the transmitter on my camera. This is ideal cause you can see the flash power settings without needing to walk all the way up to the kit.
Etienne Geoffroy-Gagnon
My go to when shooting fast sports like snowboarding is to usually use shutter speed to freeze the action. This works well with the Elinchrom Hi-Sync technology as you can sync the camera/flash up to speeds of 1/8000th of a second. While the highest shutter speed I shot here was 1/2000th, it’s still is fast enough to freeze the action, then I’m only using the light to create the look that I am after. This allows me to properly expose for the bright sun, and not need to rely on a short flash duration to freeze the action. While I do like the motion blue you can achieve with flashes, this was not something I wasn’t interested in for this shoot.
Since this shoot was part of a video project, most of the riders were doing bigger tricks that look better on video but don’t always shoot as well for photos. Especially when shooting only a single frame at the peak of the action and not a sequence due to the recycling times of the light. This is where communication with athletes is important. Being experienced with snowboarding I know what type of tricks will look better so I asked some of the riders to do this. Trick like backside 180’s or frontside 360’s really slow down the speed they are spinning and allow them to add as much style as they can. It also makes it easier for me to capture the photo at the exact moment they are poking their trick, almost always resulting in a better photo. Communication with athletes is not unique to this type of shoot, anytime I’m shooting, if I know exactly what my subject is going to do, or how they are going to move, it allows you to be better prepared for what is going to happen.
The second night shooting was cloudy most of the night with the sun only breaking through in the last 15 minutes of the day and create spectacular colours that we weren’t fully expecting. When this happens you need to be dialled and already have lights in place, and be ready to go. The light goes quickly and its a pretty action pack few minutes before it was fully gone. Once the sun finally dips below the mountains and the colour is gone I find I always take a couple minutes and just be stoked for what happened. On both these nights I was really excited about the images I captured and was excited to show the riders.
After that it’s back to packing all my lights with how I brought them up, and then snowboarding down in the dark back to the parking lot.
Gear
Canon R5
Canon RF 24-105 F4
Canon RF 70-200 f4
Elinchrom ELB 1200
Elinchrom HS Head
Elinchrom High Performance Reflector
Tripod with spigot to hold flash head